Monday, 31 October 2011

[Toilet Roll Holder]


I made some bathroom curtains and I had some material left over and did not know what to do with it. Then an idea came tinto my head, a toilet roll holder to match, so that's what I did.

List of materials you will need to make your own
Piece material measuring 37 x 7 ½ inches
2 Toilet rolls (not cheap ones)
Piece ribbon 5 ½ inches


To start making the holder:
Lay the material with the inside showing upwards, and turn in both the sides at 1inch then machine or hand sew down. See Pic 1 
Pic 1


Now you are ready to make the pockets:
Measure 10 ½ inches in from one end, and then place the toilet roll, take the other end and fold it over the roll when doing this make sure that you do not pull it tight
as you need to be able to fit the roll in pocket with ease. Pin in place then again machine or hand sew in place. See Pic 2 
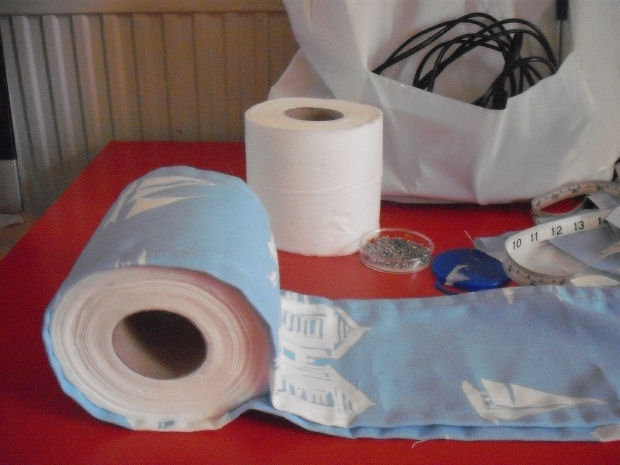
Pic 3


You are now ready to place the other roll:
Place the roll alongside the other one and then pull over the material as you did before again not too tight. With the two ends fold them in together and make it as close to the roll making sure you put the ribbon in the centre then machine or hand sew in place. See Pic 3 
Pic 3


Your toilet roll holder is now completes and should now look like this when finished.


Finish 1
Finish 2

Remember you can use any fabric you like to make one of these, and you can make it  well within 1 hour. It is just something that makes your bathroom or toilet room look decorative.


Sunday, 11 September 2011

[Poppy Bookmark]


I was looking in a craft shop and I saw this bookmark, I like poppy's so I decided to make it and this is the finished bookmark. 


I think this will look lovely inside a page when opened. In fact a friend saw it liked it very much so I gave it as a gift.

[ Baby’s Room]


My Daughter is having a baby soon and she asked me if I could make some animals in cross stitch.


I am pleased with the way the cross stitch has turned out as I found it difficult to match the colours to the orignail pictures.

Friday, 2 September 2011

[Cross Stitched Wedding Card]


This is the first time I have made a cross stitch for a card. I made this card for a friend daughter's Wedding, and this is how it turned out.


I am very pleased with the card and how it looks, I just wanted to make a different card useing other ideas than the stickers etc that you can buy in the shops. I enjoyed making this card ,it took longer to make but it think it is worth it.The friends daughter was very pleased with it. 

I would appreciate any of your comments.

Sunday, 21 August 2011

[Needle Case]


My project today was making a needle case

What you will need

A piece of white 14 count –Aida measuring 8 ½ x 4 ½
Piece of material for the backing, I used a spare sheet and cut a piece measuring 8 ½ x 4 ½ inches and that allows for the turning in either side.
1 piece of felt any colour measuring 7 ½ x 3 ½ inches
Use a needle that is not too thick, a thin darning needle with a big eye is idea for cross stitching Choose coloured silks for your design. I used theses colours as I had them left over from a previous design.
I copied my design from my old case that I made a few years ago, which is now showing its age.

How to find the centre of the Aida measure 4 ¼ inches from the left or right hand side.
First fold the Aida in half, (see pic 1)

Fold in half again (see pic 2)
To find the centre to start your work, measure 2 ¼ inches then mark with a pin or a thread ( see pic 3)


Now to start you cross stitch, choose design of your choice and start in the middle of the cross on the right side (see pic 3)

I choose this as my design (see pic4)

Now you have completed your design.Count in from the edge of the Aida 4 rows on each side, then 1 row of cross stitch on each side (Pic5) to fray the edge remove 3 rows all the way round to the row of cross stitch.


Cover the inside with the material for backing (see pic 6) once backing has been placed you can hand or machine stitch to the Aida.

Now you are ready to place the felt in your needle case, fold the felt in half and place it in the middle of the case and again hand or machine sew in place (Pic 7)
 
Your needle case is now complete.
 The End.